5 tips for creating your next project fast
There’s just not enough time in the day. We’re not time-poor, we’re time-destitute. So, we won’t waste a precious second more—here’s five tips for creating your photo book or album fast.

1. Edit down your photos
The great thing about today’s photography climate is that it’s easy and accessible to all. If we see something we want to capture, we simply reach into our pockets, aim our phones, and click—and click and click and click. It's easy to get carried away and before we know it, our image folder is full. These are not all money shots. Try to delete at least half of the images in your photo folder before you upload them to our Design Studio. Sometimes we have to be ruthless in our culling, but it's worth it in the long run.
2. Upload and order
Our Design Studio is available on desktop, tablet or mobile, meaning you can easily alternate between platforms to upload photos that are on separate devices. For those creating on mobile, we recommend adding all of your images into an album prior to creating your project. That way, your photos are all in one central place - no need to scroll through your entire camera roll to find the right photos. Once your photos are uploaded, resist the urge to start creating straight away. Spend some time in your MILK Photo Library sorting and ordering your photos. The 'Sort by date taken' feature is quite helpful here. A photo book or album is essentially a story—whether of a person’s life, an event or a trip, and generally these stories follow a linear, chronological timeline. Ordering by date taken will handily arrange your library, allowing you to tell the story as it happened, with ease.
Read our blog on organizing your photos for helpful tips and tricks to cleaning up your photo library.
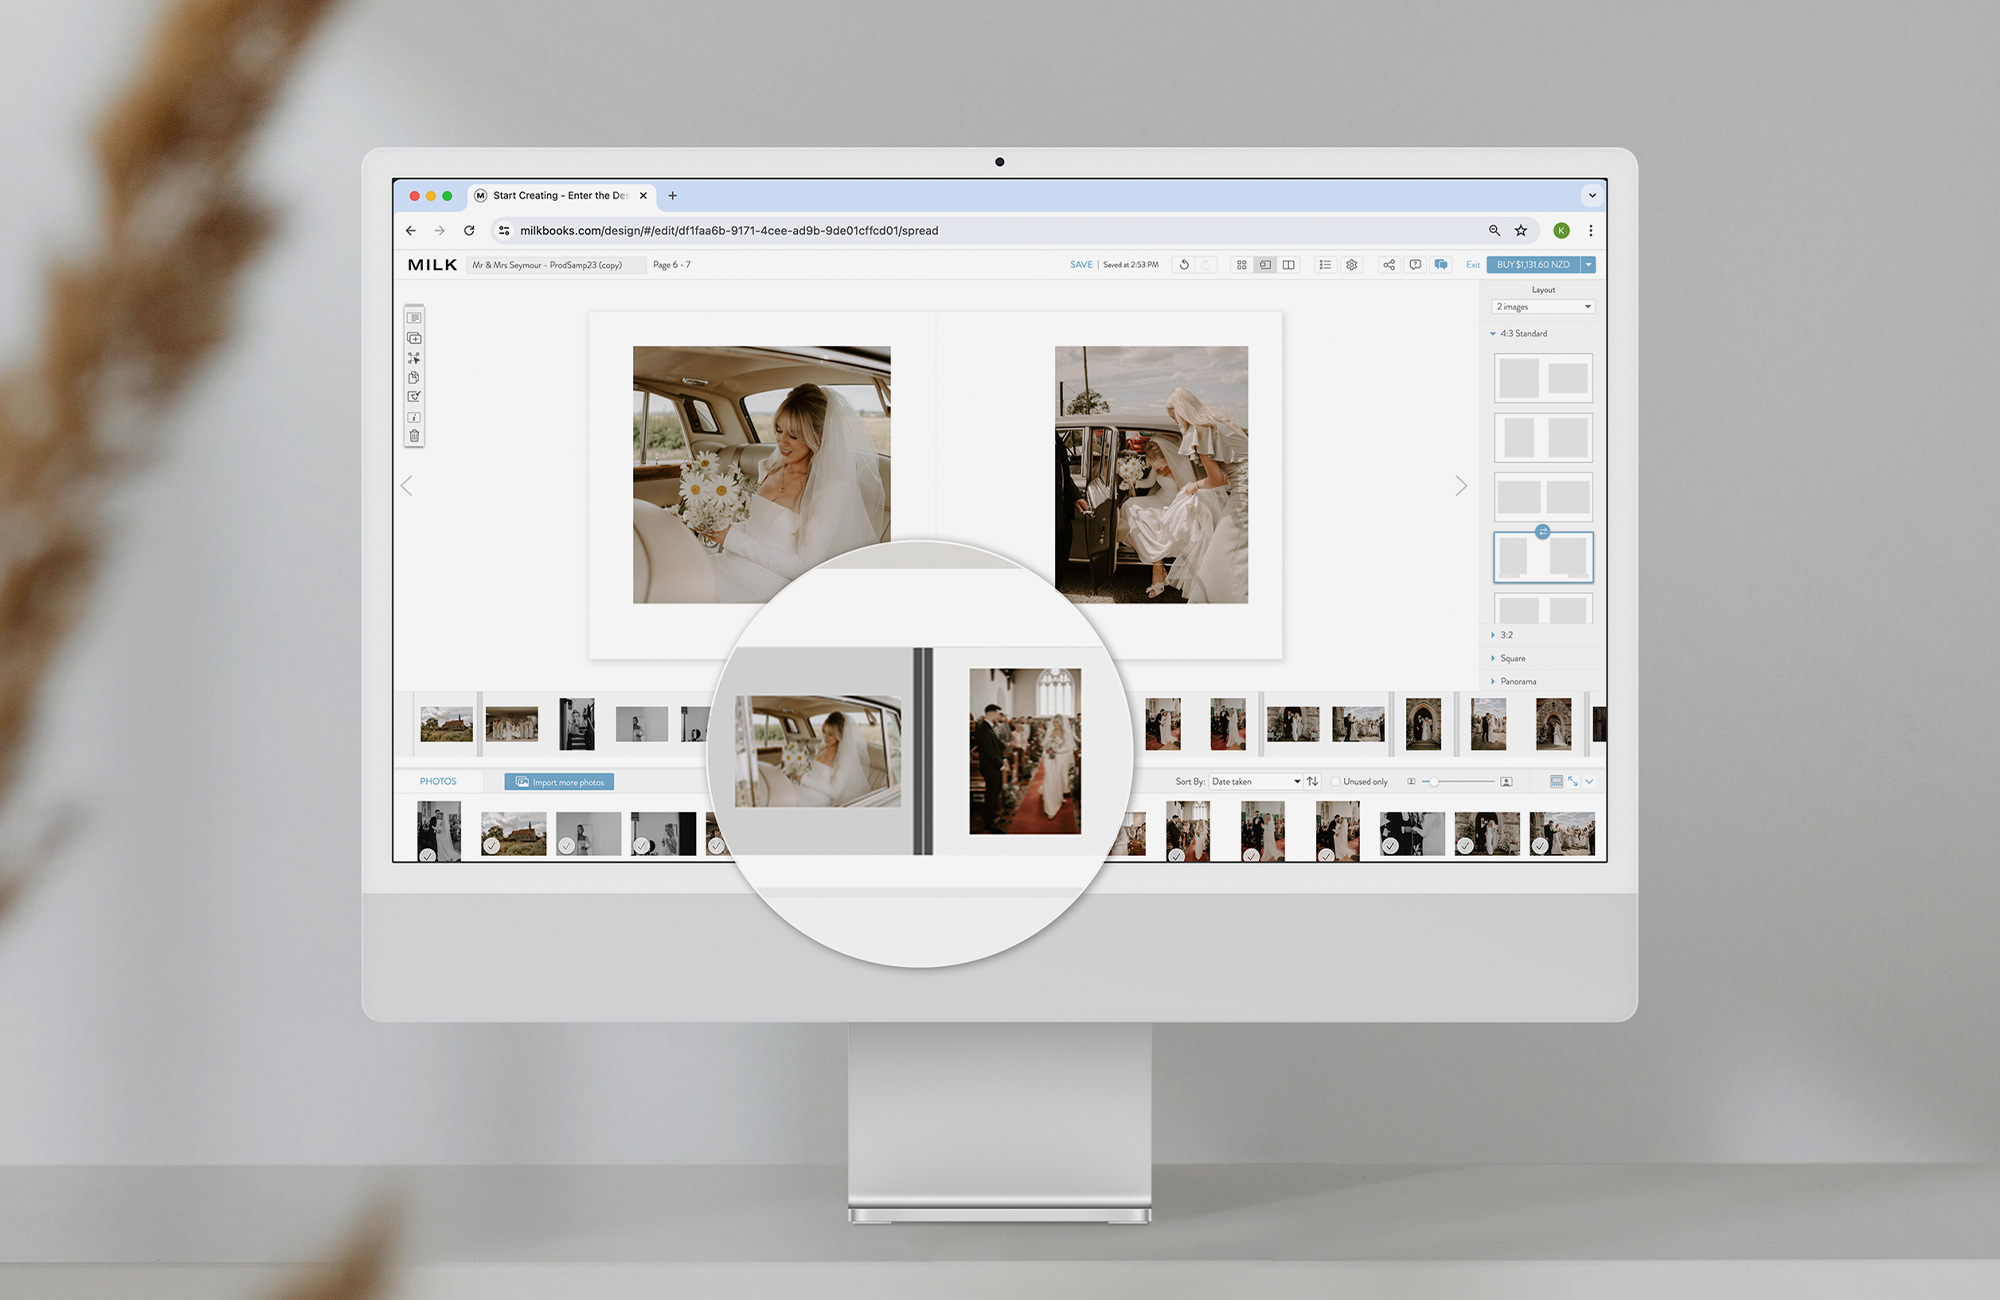
3. Take advantage of our quick-create tools
Autofill:
Our Autofill function allows you to create a book in seconds and is available for those creating on desktop and mobile devices. After you've uploaded your photos simply select the number of images you'd like per spread, select your page count and then click Autofill. Our smart technology will then populate your book according to your chosen settings and automatically select the best template for your images. Then, all that's left for you to do is to review and put the finishing touches on your project.
Image slicing:
For those who prefer to create from scratch, our Design Studio has a function called "image slicing". This is available only when you're creating in Page Divider Mode on desktop. After uploading your images, choose to create using Page Divider Mode. Your images will appear at the bottom of the screen, in your "timeline". Hover your mouse between any two images in your timeline to bring up the Slicing tool. Simply click to "slice" or divide them into spreads. You can add up to 24 images per spread in most MILK formats. From there, all that's left to do is select layouts and click to adjust the images within the frames. You'll be amazed how fast your book comes together when working this way. For more help using Page Divider Mode, watch our Design Studio tip videos.
4. Create on the go
Our Design Studio is available for mobile devices, allowing you to create anywhere, anytime. Create entirely on mobile or alternate between platforms with ease. You could start creating on the home PC and then pick up where you left off while you're on the bus to work. Our mobile Design Studio has all of your favorite tools from the desktop version - simply use your usual gesture controls for touch screen.
5. Ask for help
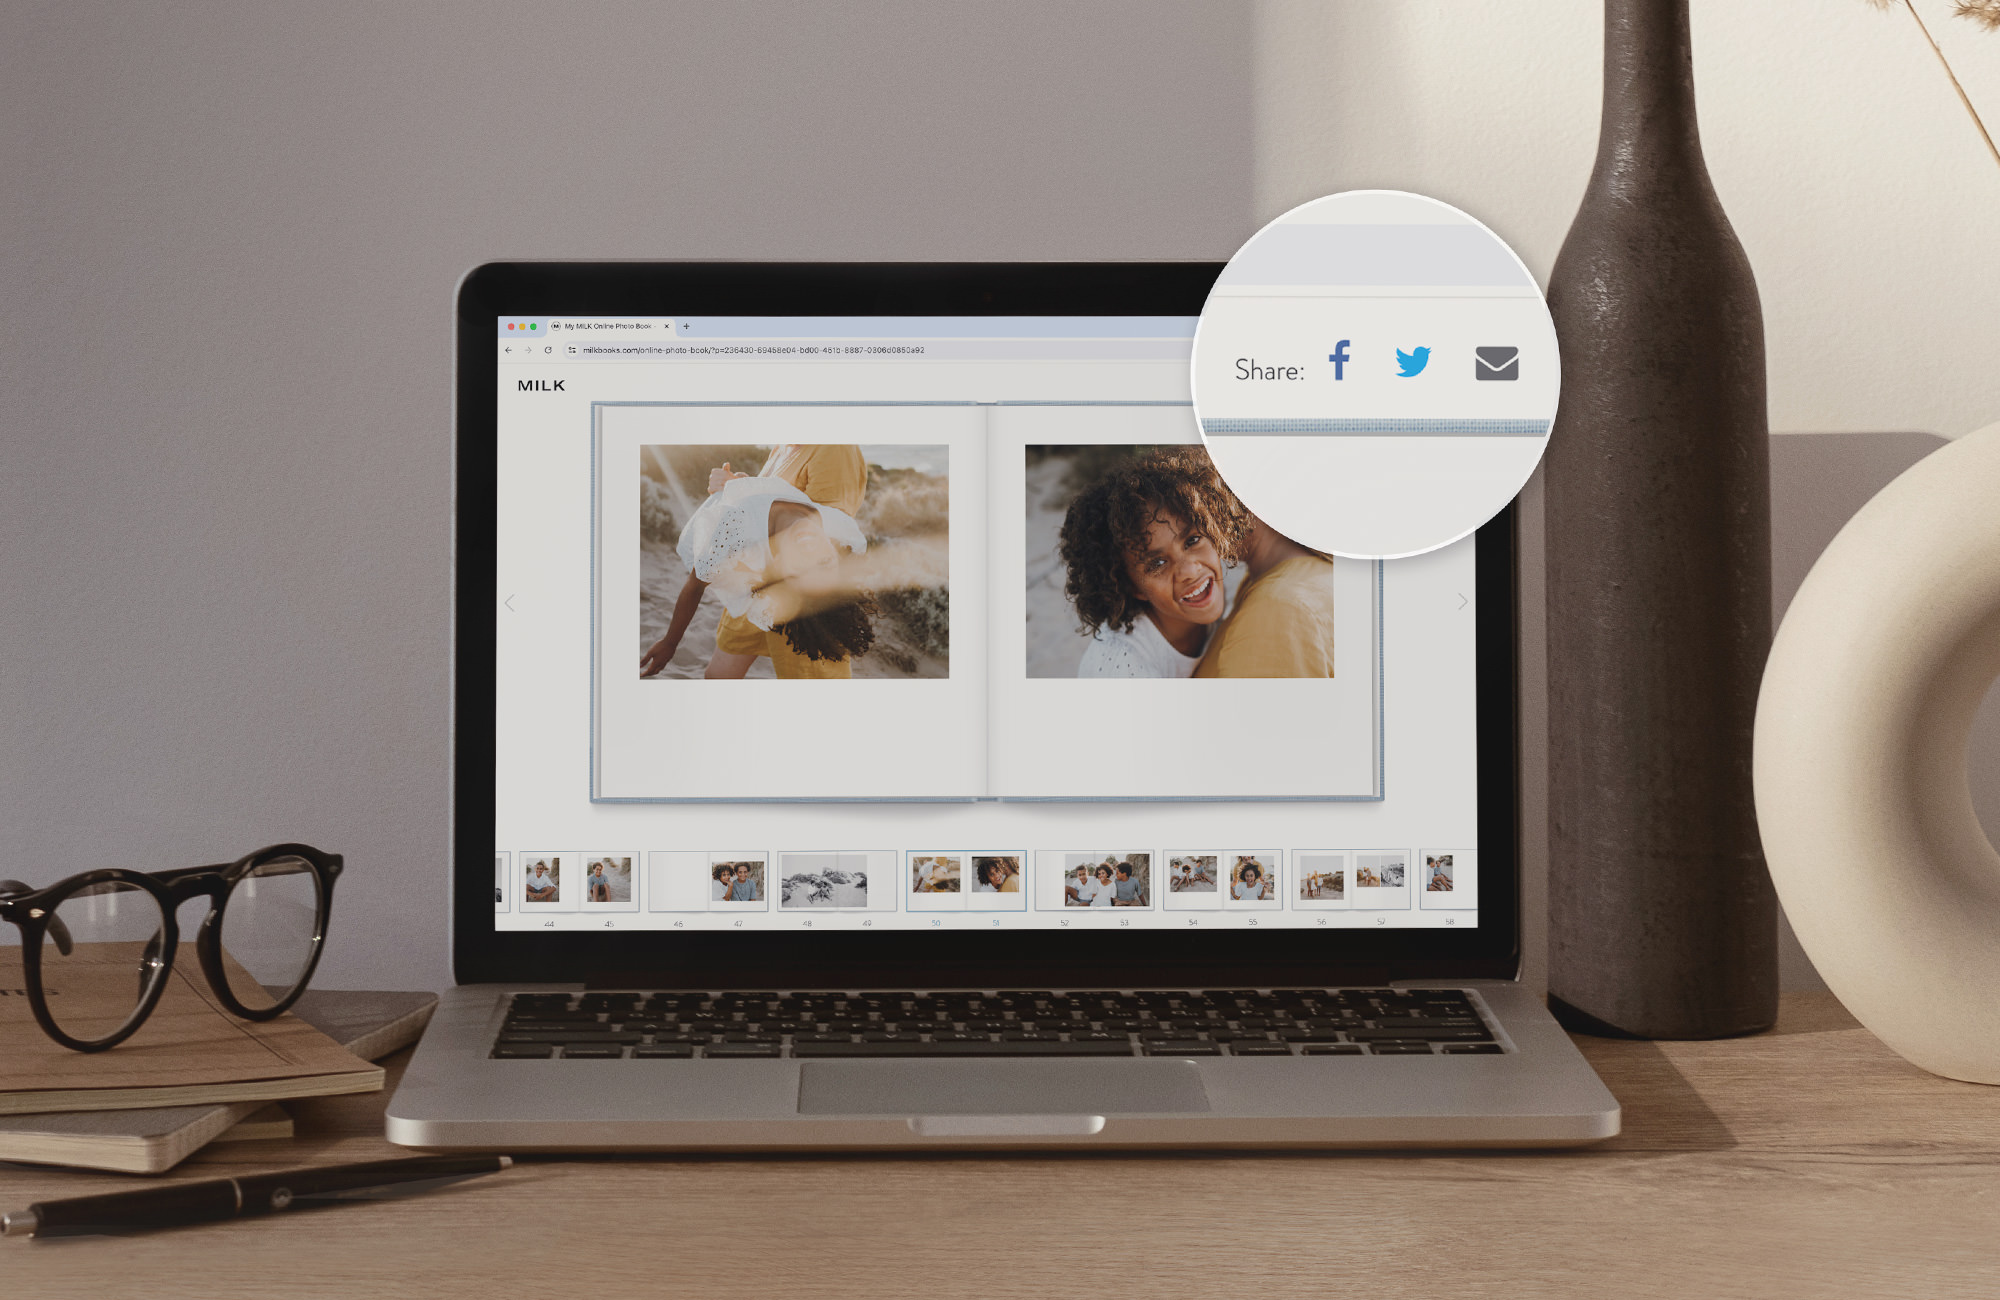
Visit our Knowledge Base or reach out to our customer service staff to get you over any humps that are causing you to procrastinate. You can also send a version of your in-progress Online Photo Book to friends via Facebook, Twitter or email. Ask for their honest opinion on your choices of photos, layouts, cover fabric and paper. You may naturally miss some details after staring at a screen for a long time, so getting someone with fresh eyes to scan any text for spelling or grammatical errors is a great help.
Finally, don't be afraid to press print
Pressing print can feel very final, but remember why you started the project in the first place and how great it'll feel to finally have the printed book in your hands. At some point you've got to banish the anxiety you're feeling due to those darn perfectionist tendencies and commit to bringing your photos to life. Also, MILK offers reprints at 50% off RRP as part of our Satisfaction Promise, so if you notice any spelling errors in your book within 14 days of receiving your order, you can always reprint.
Explore our top sellers