Follow these simple steps for stunning print results
Creating a stunning photo book is all about capturing and preserving your most precious memories in print. At MILK Books, we share your passion for bringing these memories to life and are dedicated to ensuring they look their best on paper. To help you achieve the best possible results, we’ve introduced an innovative tool that will help you choose the best photos and Designer Templates for your project. Discover how our image quality tool can enhance your keepsake.
1. Upload your photos
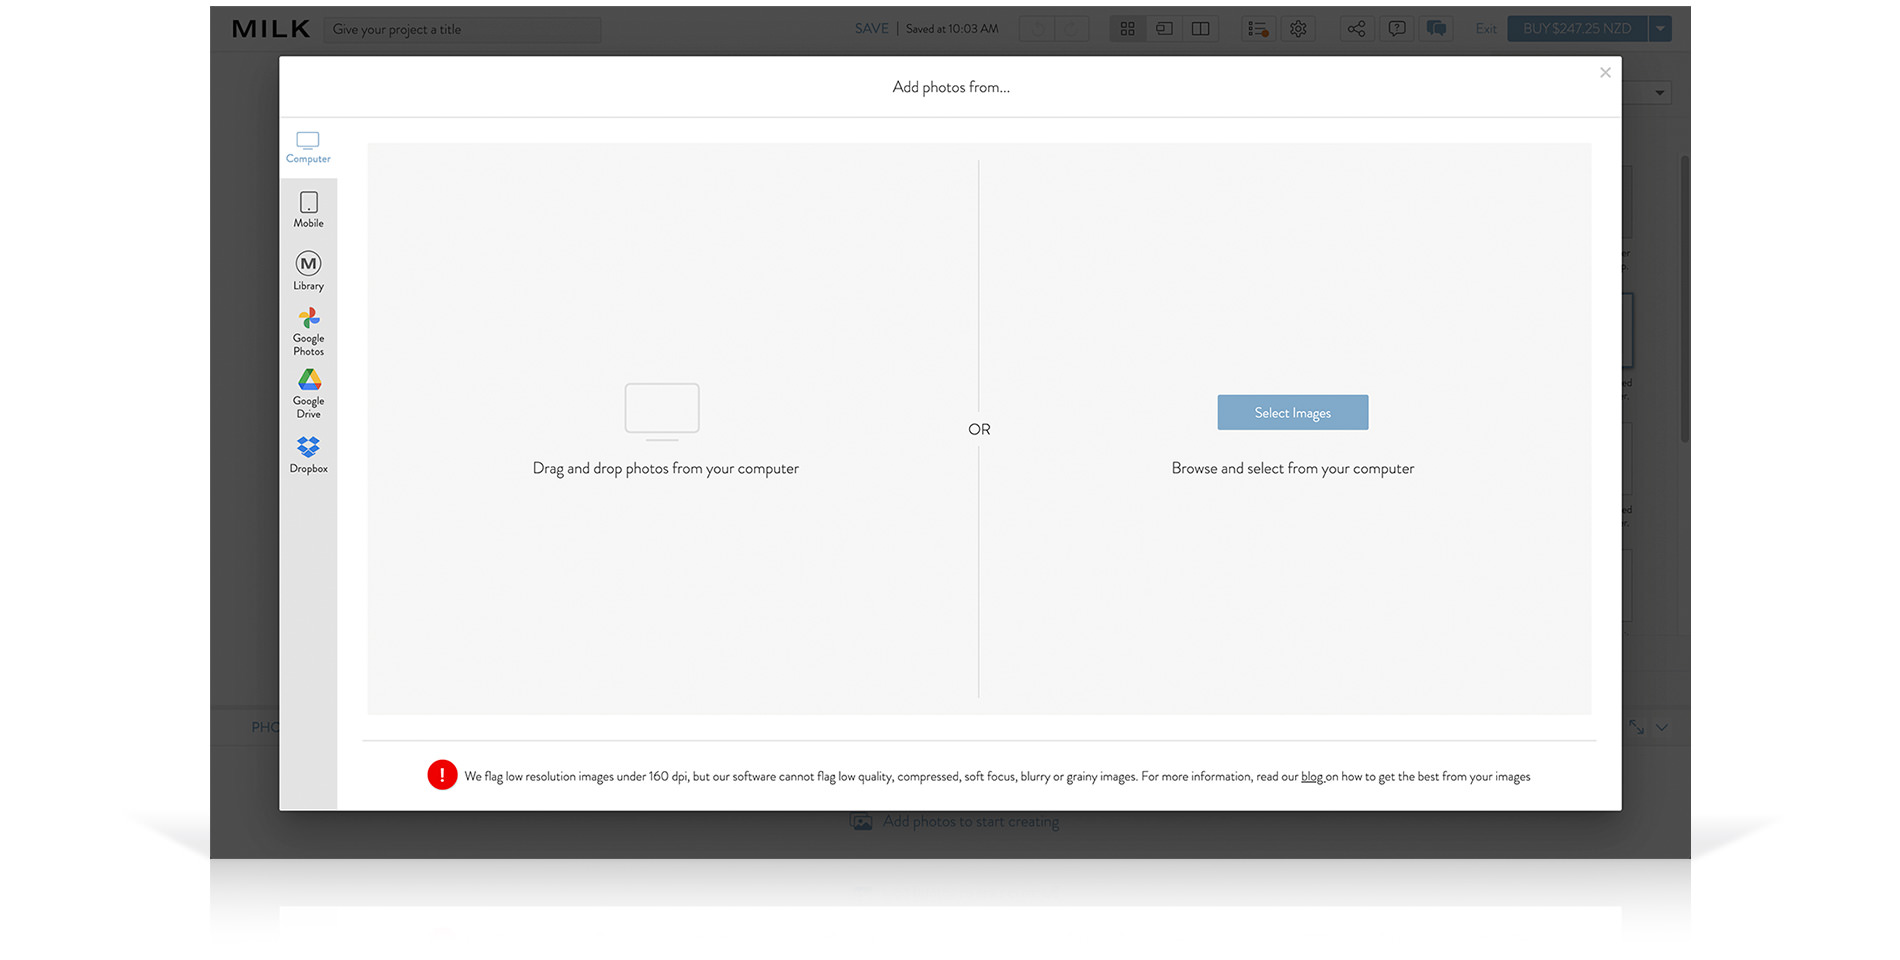
Begin by uploading your photos into the MILK Books Design Studio. You can import photos directly from your computer, Google Photos, Google Drive or Dropbox. If you’re creating on mobile, you can add photos directly from your camera roll.
2. Add your photos to your project
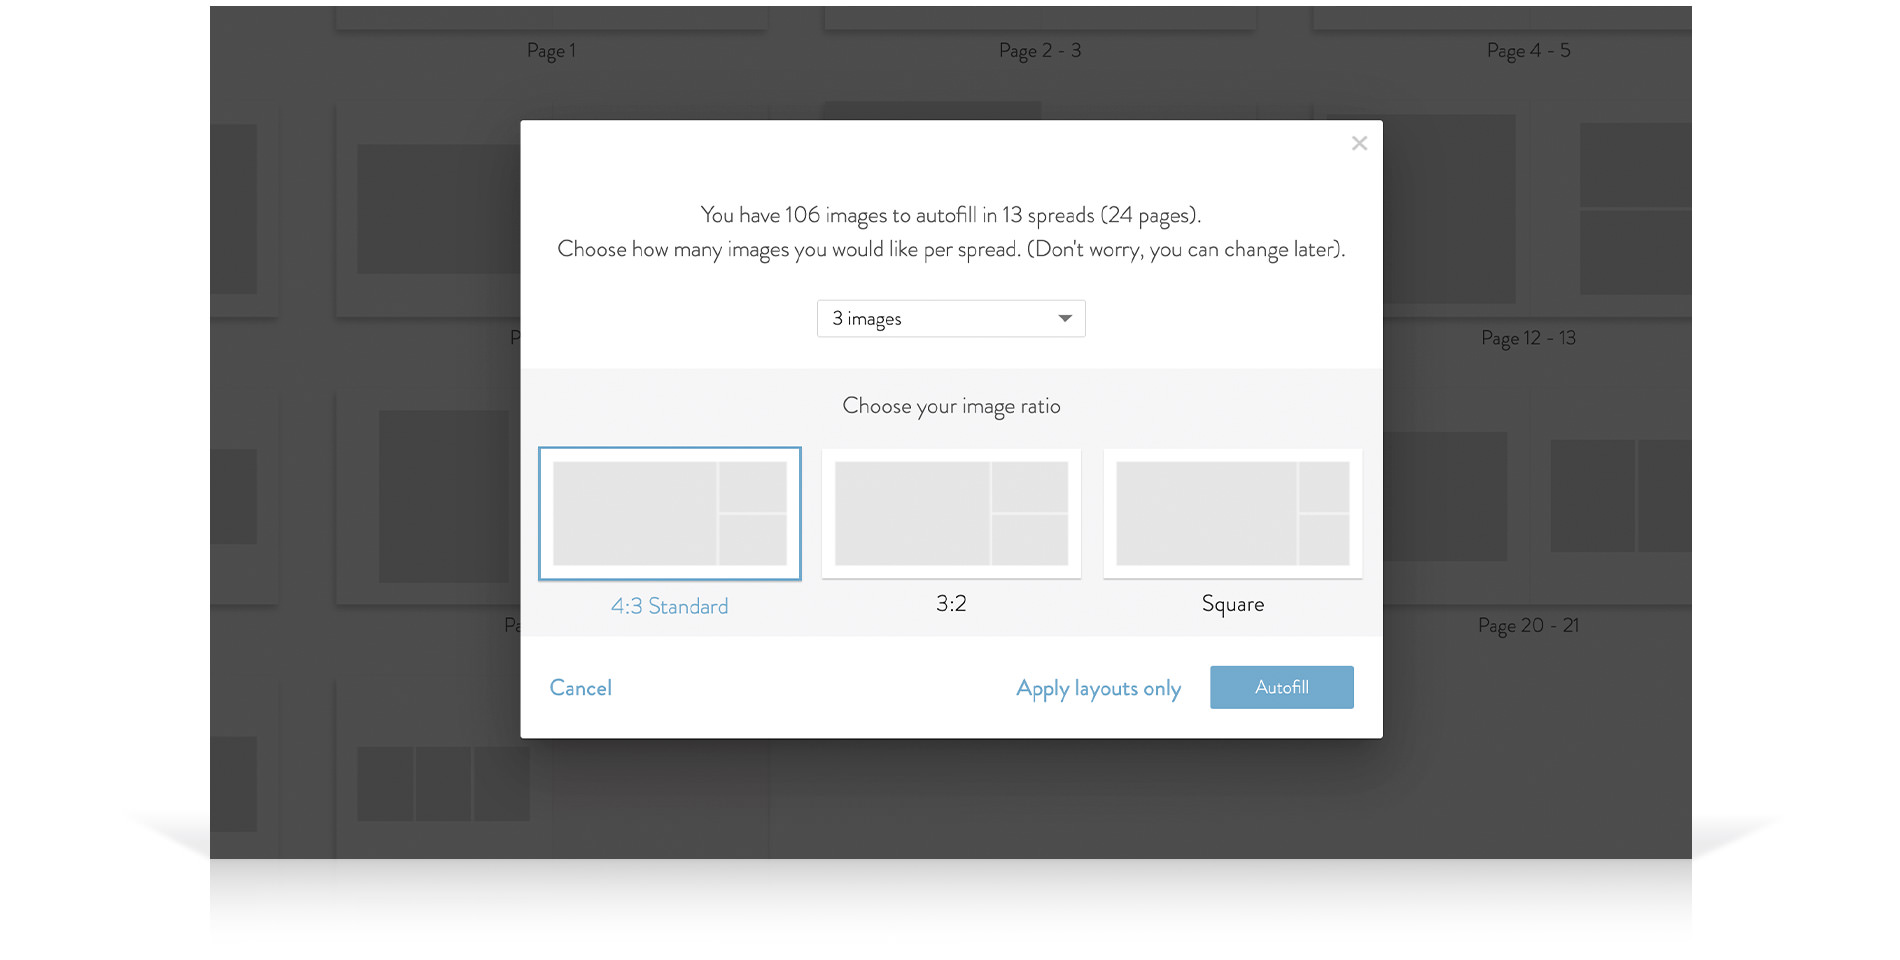
Once you’ve uploaded your photos, it’s time to add them to your project. You can either add them one at a time or take advantage of our Autofill tool. With Autofill, simply select the number of images you’d like per spread, select your page count and then click Autofill. Our smart technology will populate your project according to your chosen settings, automatically finding the best templates for your images. Then you can make any final adjustments.
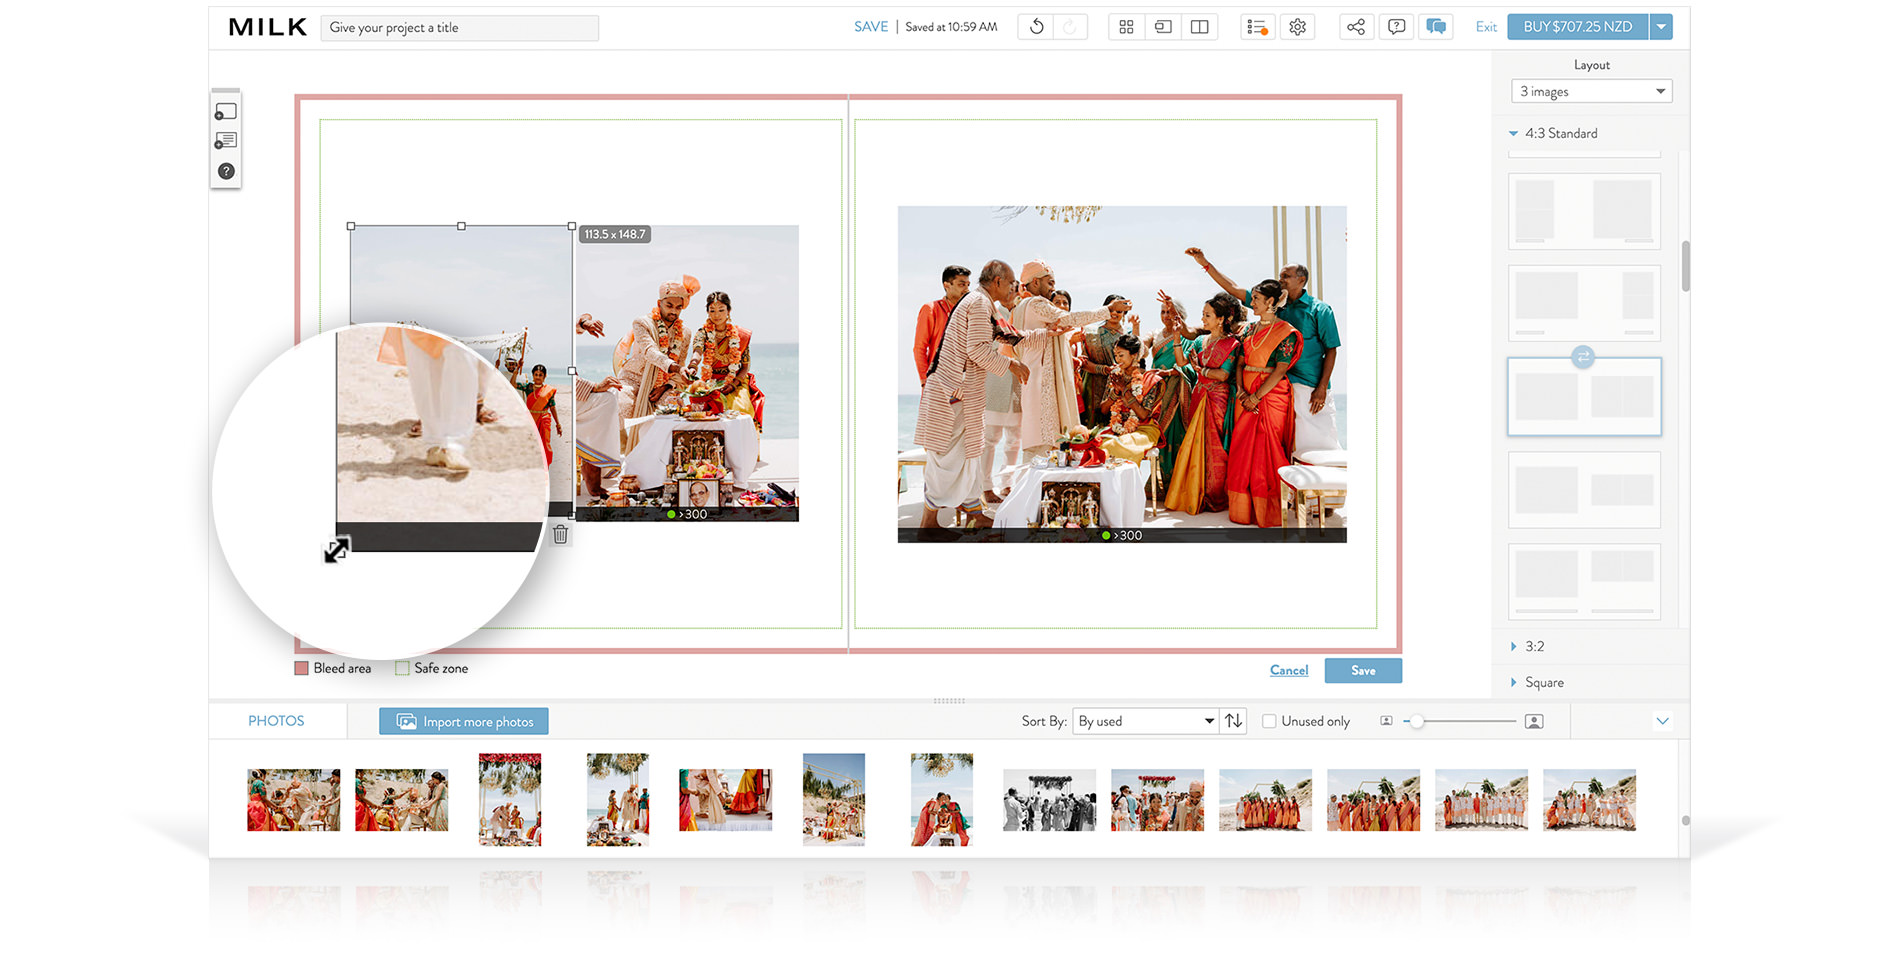
3. Turn on the image quality tool
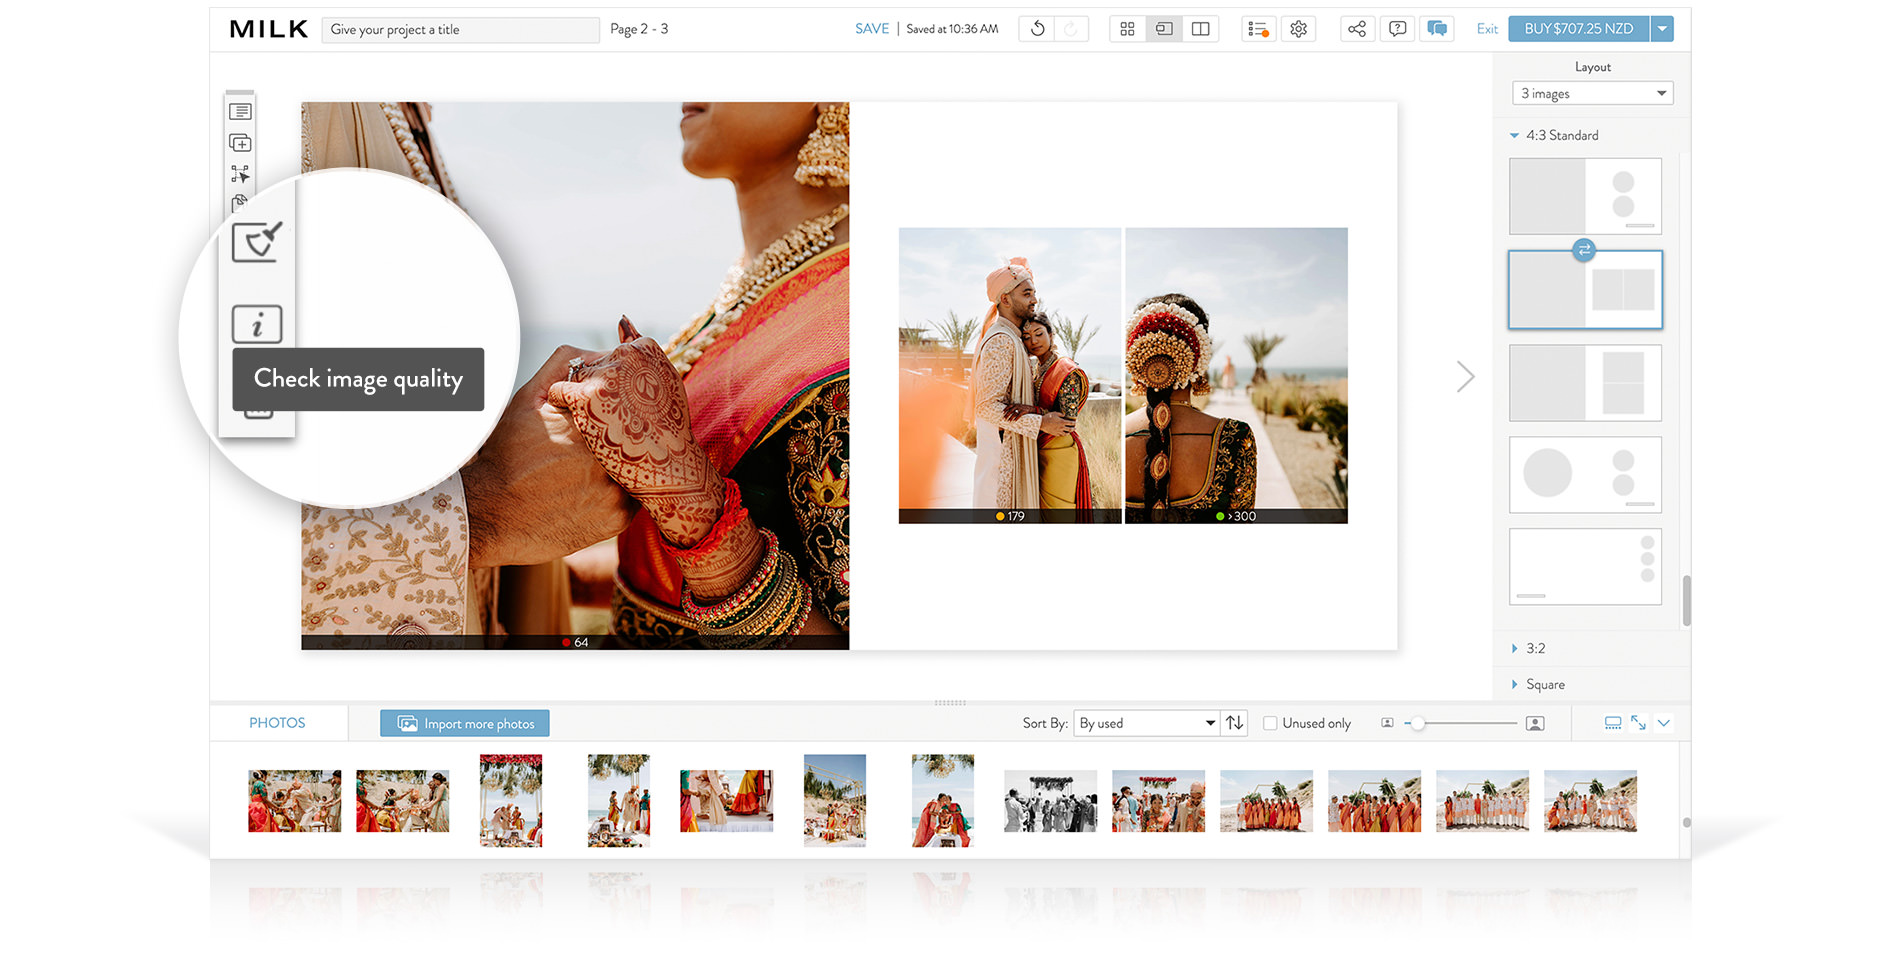
After adding photos to your project, turn on the image quality tool to check the resolution. Ensure you’re in Spread View (viewing your project one double page spread at a time), and find the image quality tool from the left-side toolbar. The image quality tool helps you identify images that may not meet the recommended resolution for high quality printing.
Once turned on, each image in your project will display a number and color indicator. This traffic light system will tell you the DPI (dots per inch) or resolution of your image; the higher the DPI, the better the print result. For a great print result, your images should indicate a green symbol at 200dpi or more.
4. How to improve the resolution of your images
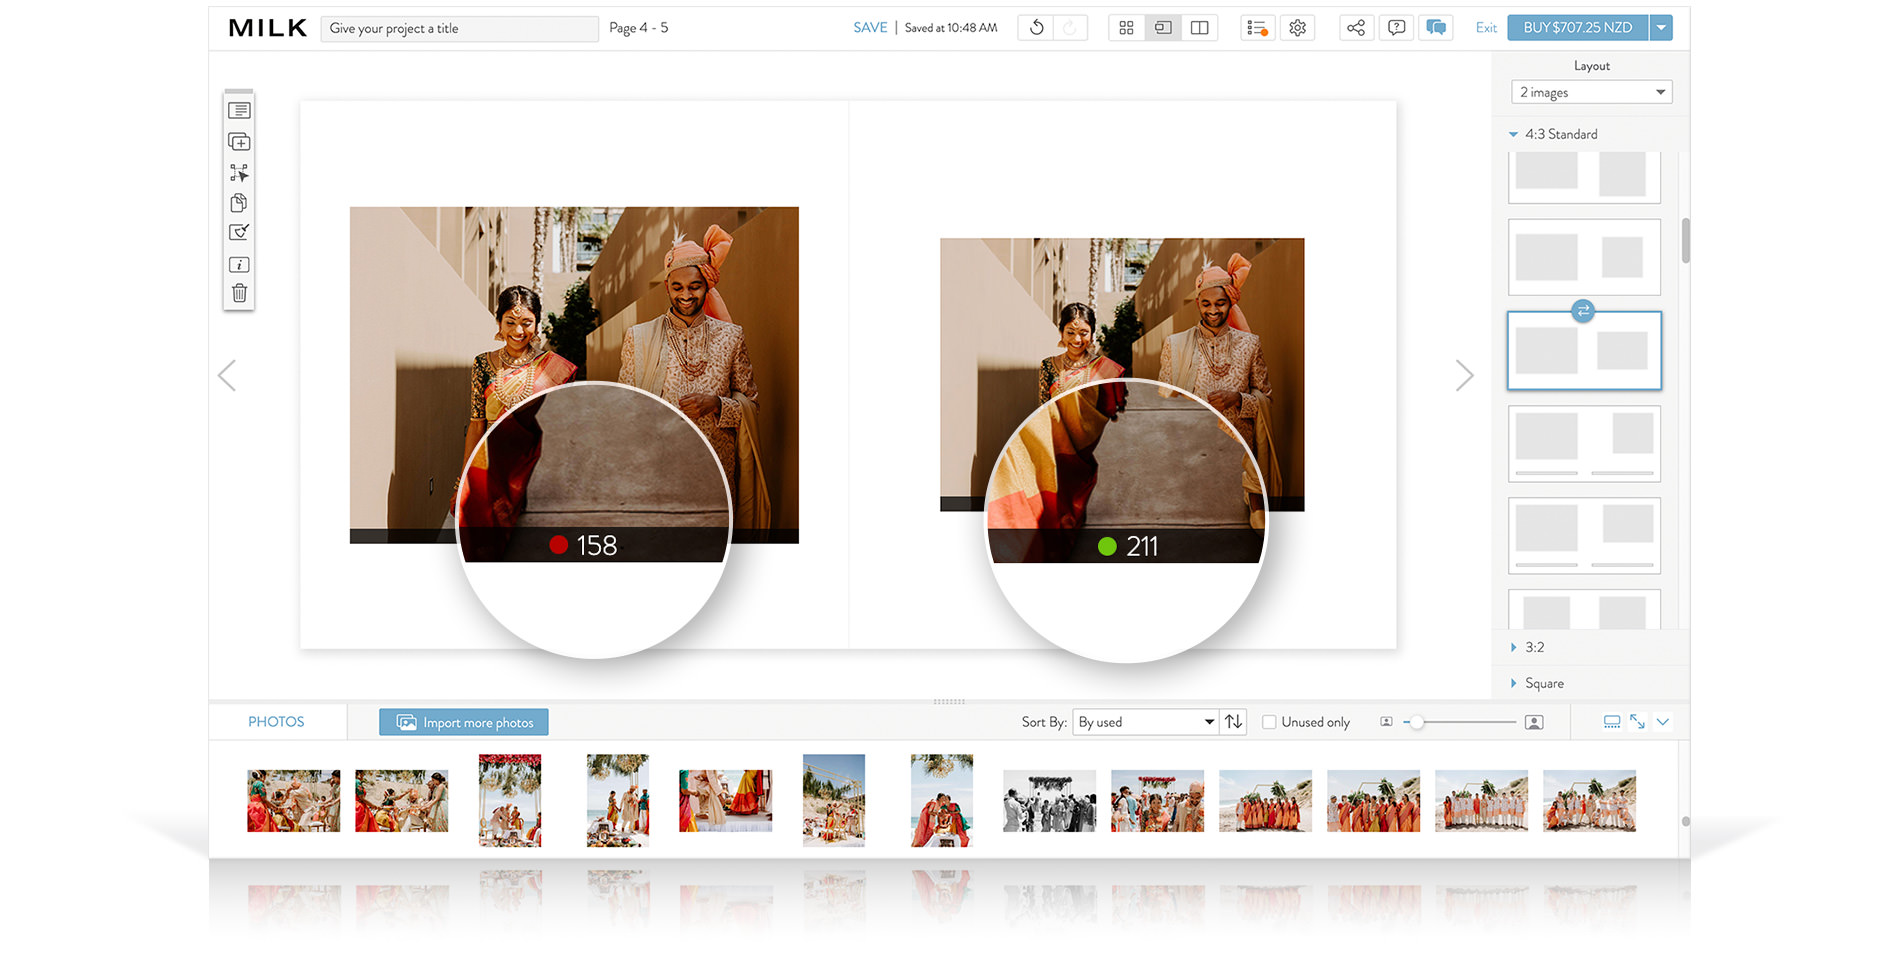
If you’re seeing orange (average) or red (low quality) image warnings, try different layouts to see if there’s a better image placeholder for your photo. Sometimes simply reducing the size of the image on the page can improve the DPI, taking it from a red warning to green.
Tip: Try match the orientation of your image with the placeholder (portrait for portrait photos, landscape for landscape photos) for best results.
5. Use free transform
If you’ve experimented with layouts and are still seeing average or low quality image warnings, try the free transform tool to further reduce the photo size on the page. (Please Note: We do not recommend using this tool to create your own custom layouts as it is difficult to achieve perfect alignment, but rather for minor tweaks to the image frames and placement.)
6. Prioritize sentimental value

While we recommend aiming for an image resolution of 300dpi at the final size, don't be discouraged from printing low quality images if they hold sentimental value. Sometimes, the emotional connection outweighs print quality.
Preserving your cherished memories in a photo book is a precious exercise. With our image quality tool you can ensure that your images will look their best in print. Start creating a stunning keepsake today and bring your treasured moments back to life.


